questions that we’ve heard more than once
SUPPORT FAQs

When configuring your email program to check mail, in addition to your User name and Password, you will need to specify the following mail servers inside your email program.
Incoming Mail Server
Server: mail.newmex.com
Username: Full Email Address (i.e. myemail@taosnet.com)
Outgoing Mail Server
Server: mail.newmex.com
Port: 587
Use Authentication (same credentials as Incoming Mail Server)
Yes, everyone using a TaosNet email should use either IMAP or POP. People using multiple devices to access the same email should generally use IMAP. People concerned about maintaining a copy of their email, for legal/etc requirements, should learn more specifics to ensure they meet those needs, but might prefer POP.
Before leveraging the vast resources available from Apple to it’s minions (https://support.apple.com/en-al/HT201320), make note of one helpful hint from TaosNet…
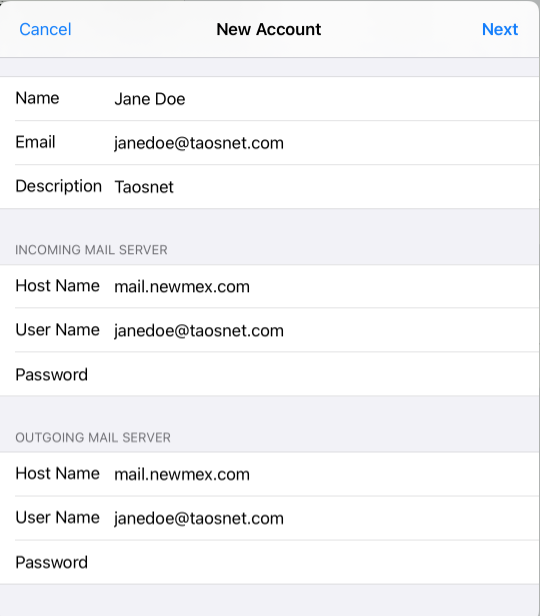
Although iOS displays the Outgoing Mail Server’s fields of Username and Password as Optional, in grey text, nearly every server worldwide requires those to be filled in. So, hunt and peck your complete email address for Username and your email password for Password.
STEP 1 – Click on Settings on your iPhone or iPad

STEP 2 – On left-side panel, scroll down to select “Mail”, and then on right-side, select “Accounts” and then “Add Account”.


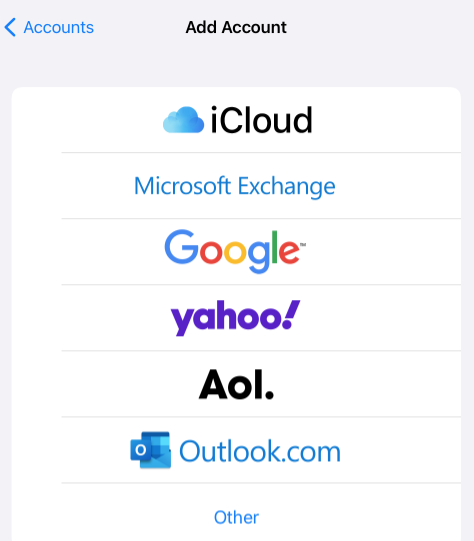
STEP 3 – Select “Other”
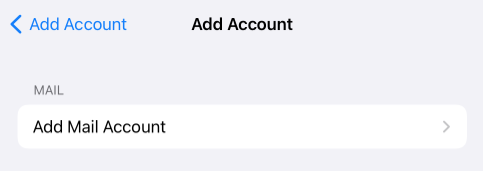
STEP 4 – Click on “Add Mail Account”
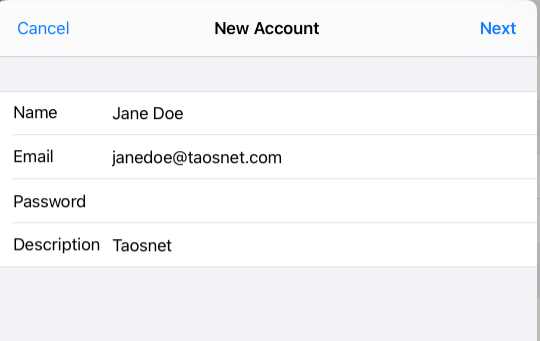
STEP 5 – Enter name that you want on the account. For Email, enter your FULL EMAIL ADDRESS. Enter your password. Enter a description that you want to identify the account. Click Next.
STEP 6 – In the Incoming Mail Server section, enter mail.newmex.com as the Host Name. Enter your FULL EMAIL ADDRESS for User Name. Enter your email password again. Repeat with the same information for the Outgoing Mail Server. Click Next.
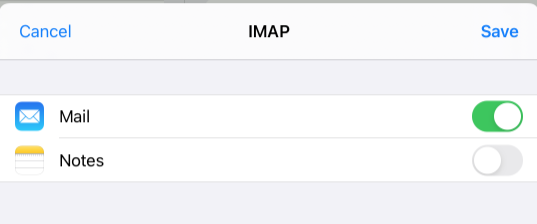
STEP 7 – Click Save and Voila! You are now ready to send and receive mail on your iPhone/iPad.
STEP 1 – Download and install Thunderbird, if you haven’t already.
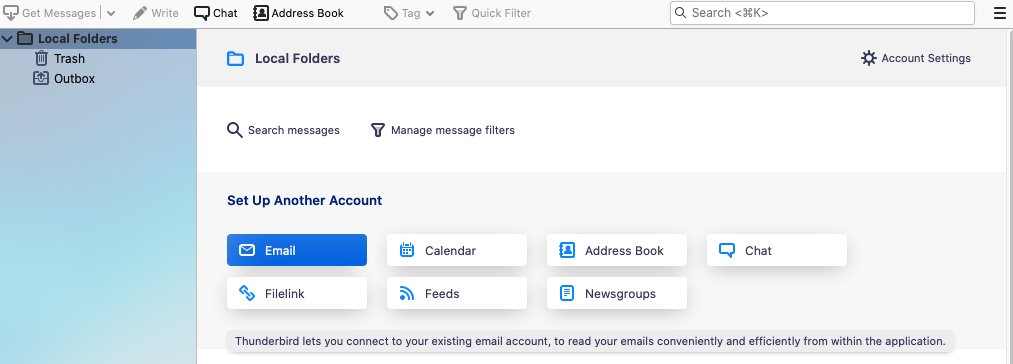
STEP 2 – Open Thunderbird and then click on “Local Folders” and then “Email”
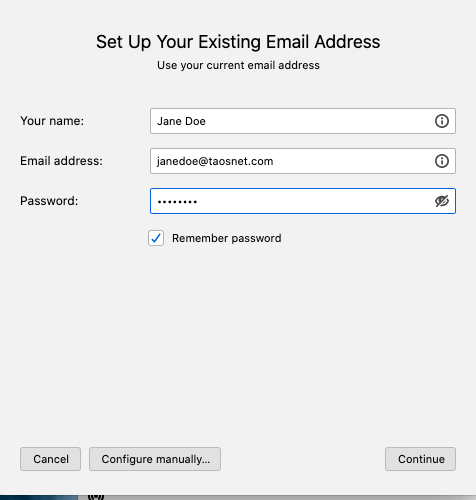
STEP 3 – Enter Your name; Full email address; and your password. The Remember password is checked by default. Click Continue.
STEP 4 – By default the server name will default to the extension of your email address (in this case mail.taosnet.com). Click on Advanced config.
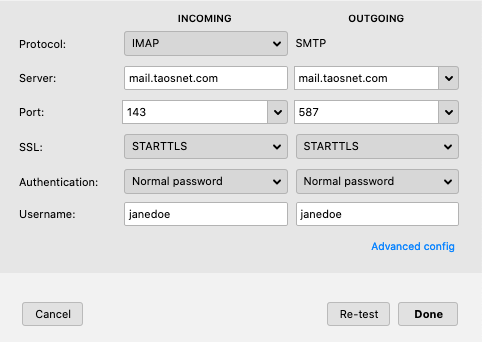
STEP 5 – Edit the Server for both Incoming and Outgoing servers to be mail.newmex.com (if you are setting up email with newmex.com extension, you won’t need to edit the server). Edit your Username to be the FULL EMAIL ADDRESS. Click done.
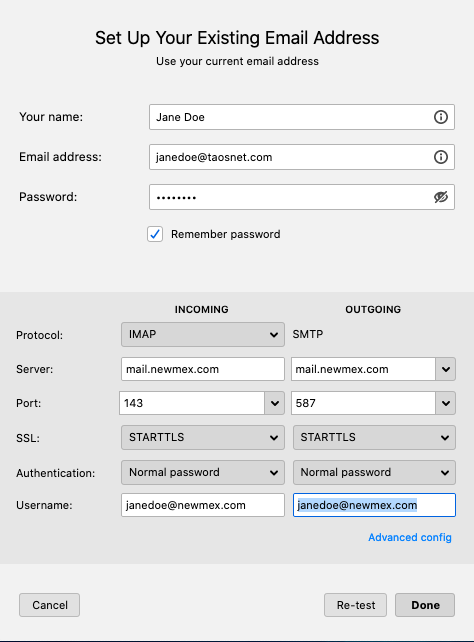
STEP 6 – Voila! Your email account has been successfully been set up!
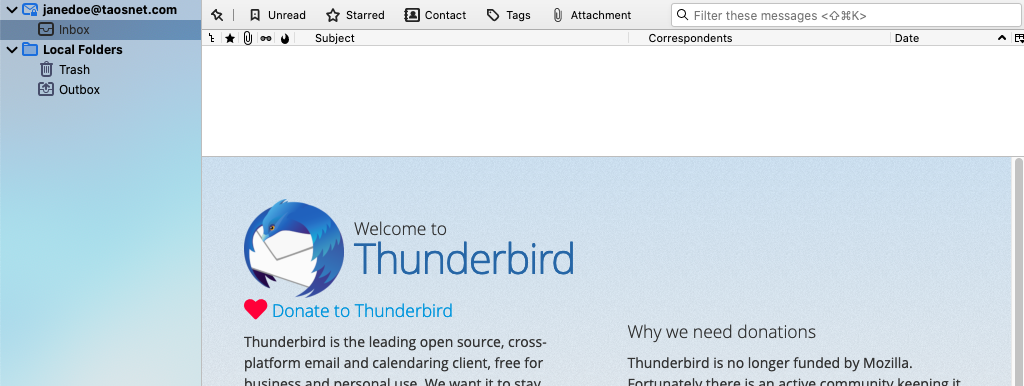
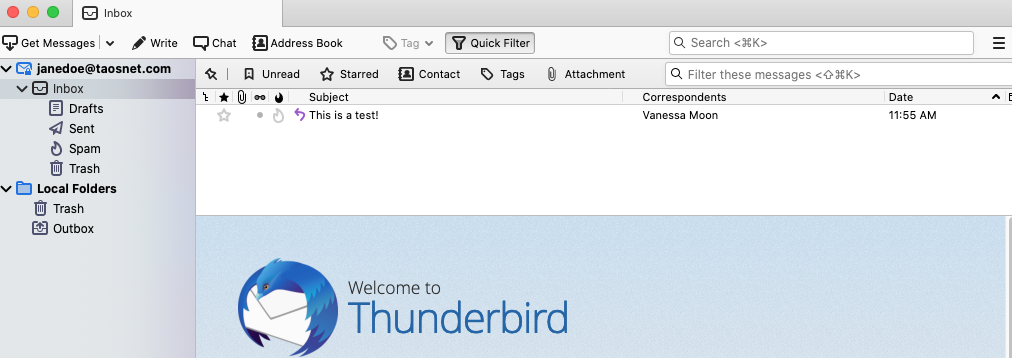
STEP 7 – In order for the server sub-folders to be synced to your Thunderbird, you’ll need to quit Thunderbird and then restart it. Once you do that you should have the sub-folders (Drafts; Sent; Spam; Trash)
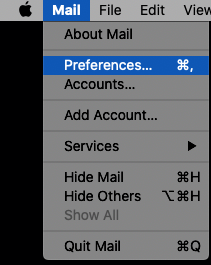
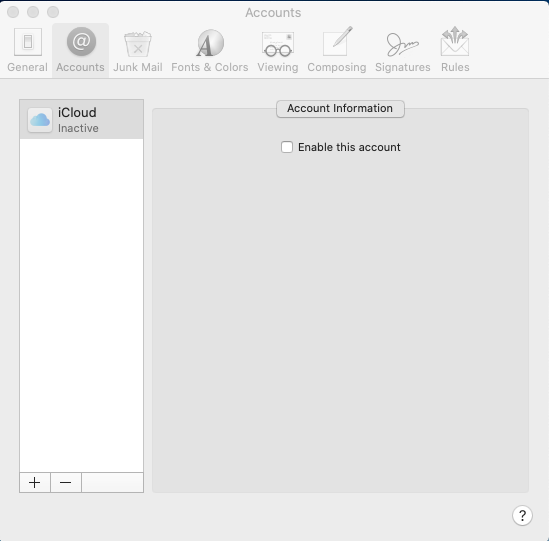
STEP 1 – Click on the Mac Mail icon in your toolbar and then click on Mail > Preferences
STEP 2 – In Accounts click on the “+” sign at the bottom of the left-side pane
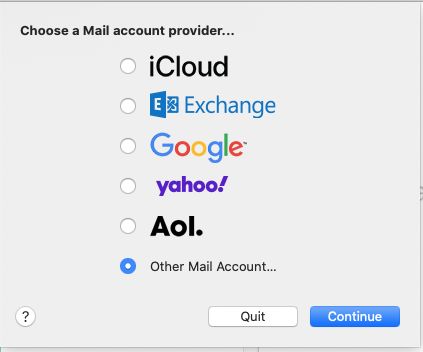
STEP 3 – Select “Other Mail Account…” and click Continue.
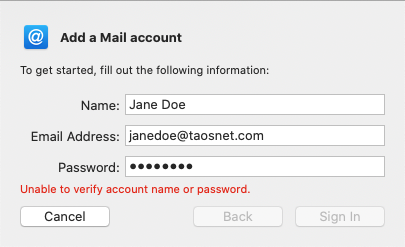
STEP 4 – Enter the Name you want to appear on the account. Enter Email Address and Password. Disregard the “Unable to verify account…”, and click “Sign In”.
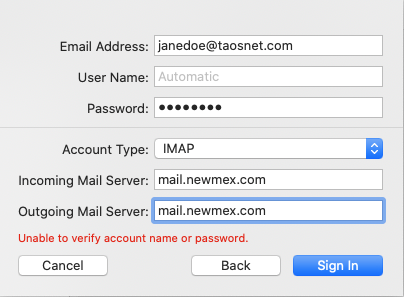
STEP 5 – Enter your Full Email Address in the Username. Enter mail.newmex.com in both the Income and Outgoing Servers. Click Sign In.
STEP 6 – Voila! Email should now be set up and you can start sending and receiving email in Mac Mail.
It is possible to send mail from a Taosnet hosted email using Gmail’s online interface.
- In your browser, sign it to the Gmail account you want to import to.
- In the top right, click the gear shaped icon and pick”See all settings”.
- Click the “Accounts and Import” tab.
- In the Send Mail As section, click on “Add another email address”

- Follow the prompts.
- When asked about SMTP server, enter mail.newmex.com (if not already pre-filled).

- Enter your full email address as Username.
- Enter your Taosnet email password, then click Add Account.
- Check your Taosnet email for a code/link from Google.
- Click on Verify.
Done.
We do NOT allow forwarding emails to Gmail accounts. The preferred method is for you to have Gmail check your account on the TaosNet servers directly, which will ensure that you receive all of your email.
To configure your Gmail as a POP client and import your emails from TaosNet’s servers, follow these steps:
- In your browser, sign in to the Gmail account you want to retrieve your TaosNet mail.
- In the top right, click the gear shaped icon, and pick “See all settings”.
- Click the “Accounts and Import” tab.
- In the “Check mail from other accounts” section, click “Add a mail account”.
- Type the full email address of your TaosNet email account, then click Next.
- Select “Import emails from my other account (POP3)”, then click Next.
- Make sure the Username is your full email address.
- Type your TaosNet email password (not your Gmail password).
- Make sure the POP server says “mail.newmex.com” (without the quotes).
- Change the Port to 995.
- Check the box “Always use a secure connection (SSL) when retrieving mail”.
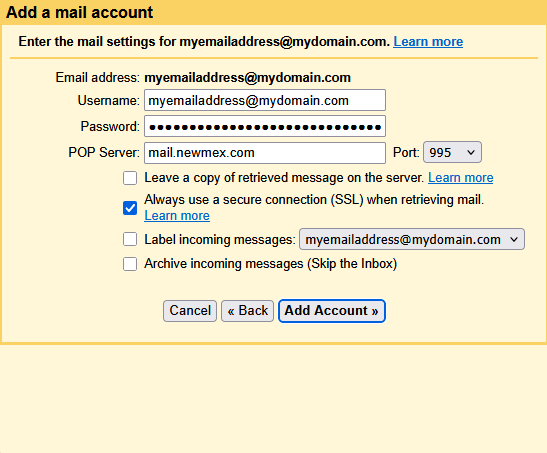
- Click “Add Account”.
- Select “No” on the Your mail account has been added page, then click “Finish”.
To send mail from within Gmail as a TaosNet account, see these instructions.
We know your time is valuable. And that becoming an expert on all things phishing is not your cup of tea. So cutting to the chase:
Scammers lie.
Scammers cheat.
Scammers deceive.
Scammers rush you.
TaosNet will NEVER email you requiring you to confirm your email password or any personal information (username, etc).
These five simple facts should keep you safe from phishing attempts. And if you aren’t sure about an email, reach out to us and have our staff share their expertise.
