Warning: scammers will often try to trick you with a fake website that looks like TaosNet’s webmail. Be particularly cautious of any notice/alert/hoax that tells you to change your password. TaosNet will NEVER send you an email to change your email password!
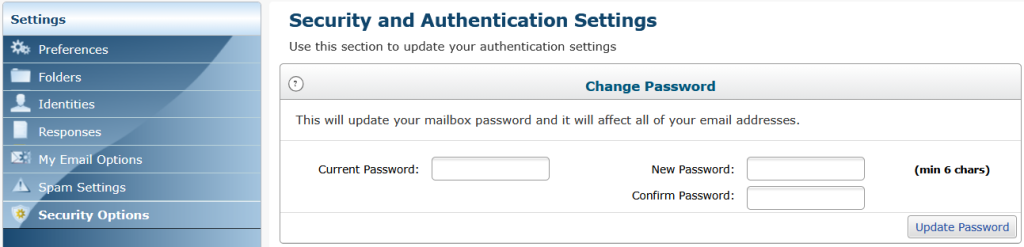
To change your TaosNet email password, you must be logged into TaosNet’s webmail (either WebmailLite or Tuxedo). Then enter Security Options. If you’re not seeing Security Options, look for Settings in the menu or Apps tool. In the Security Options screen, you will need to enter your current email password once and your new email password twice. Then click Update Password.
After you’ve changed your password, if you use an email client like Thunderbird, Apple Mail or Outlook, you’ll also need to update that program with your new password.
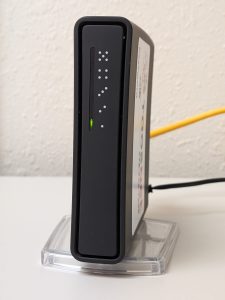
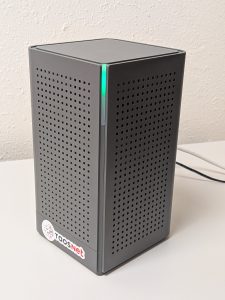
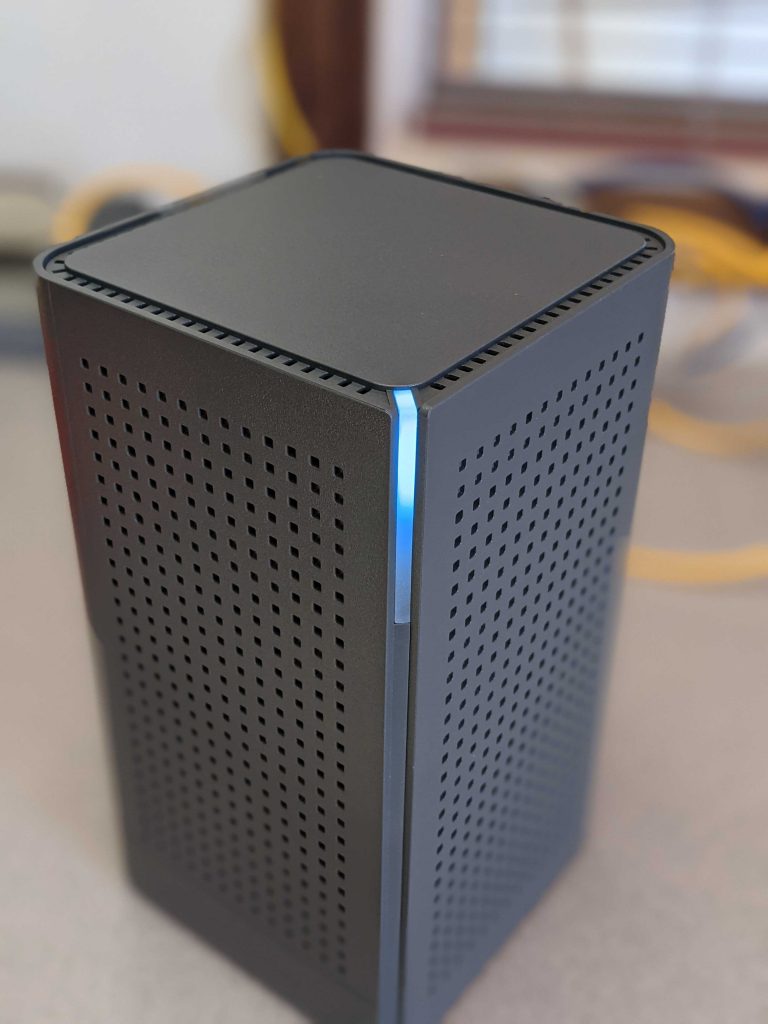
Wondering if your router is trying to get your attention? Check out these photos of routers relaxing in their native habitat. If your router looks like either of these, your router is most likely fine. Otherwise, give us a call and we’ll help soothe your router beast.
TaosNet’s free router, in most installations, only has it’s power cord and the single ethernet cable from the rooftop antenna, and therefore only the ‘one’ will be lit on the front. The ‘one’ may blink occassionally as it also indicates activity of your internet service. If you have additional ethernet cables connected, you may have additional lights lit.TaosNet’s upgraded Blast router, regardless of the number of ethernet cables in use on the back, will have a steady green light during normal operation.
We know your time is valuable. And that becoming an expert on all things phishing is not your cup of tea. So cutting to the chase:
Scammers lie. Scammers cheat. Scammers deceive. Scammers rush you. TaosNet will NEVER email you requiring you to confirm your email password or any personal information (username, etc).
These five simple facts should keep you safe from phishing attempts. And if you aren’t sure about an email, reach out to us and have our staff share their expertise.
We do NOT allow forwarding emails to Gmail accounts. The preferred method is for you to have Gmail check your account on the TaosNet servers directly, which will ensure that you receive all of your email.
To configure your Gmail as a POP client and import your emails from TaosNet’s servers, follow these steps:
In your browser, sign in to the Gmail account you want to retrieve your TaosNet mail.
In the top right, click the gear shaped icon, and pick “See all settings”.
Click the “Accounts and Import” tab.
In the “Check mail from other accounts” section, click “Add a mail account”.
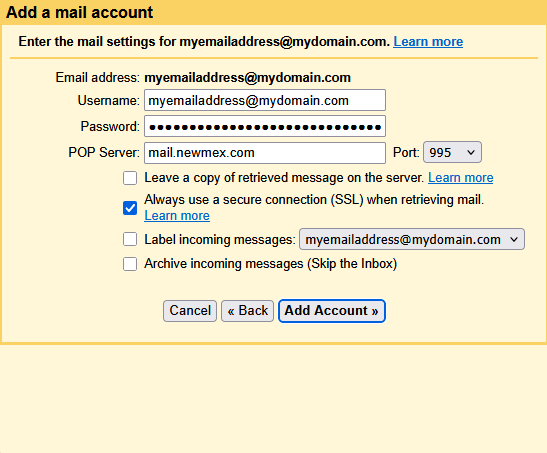
Type the full email address of your TaosNet email account, then click Next.
Select “Import emails from my other account (POP3)”, then click Next.
Make sure the Username is your full email address.
Type your TaosNet email password (not your Gmail password).
Make sure the POP server says “mail.newmex.com” (without the quotes).
Change the Port to 995.
Check the box “Always use a secure connection (SSL) when retrieving mail”.
Click “Add Account”.
Select “No” on the Your mail account has been added page, then click “Finish”.
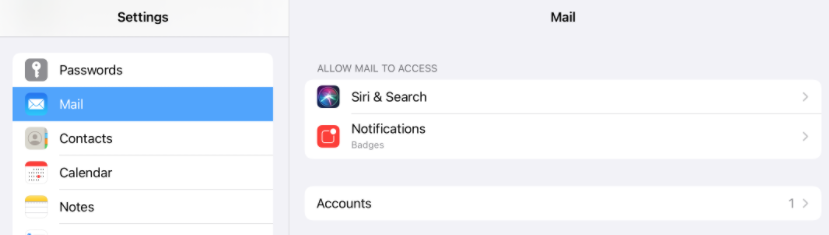
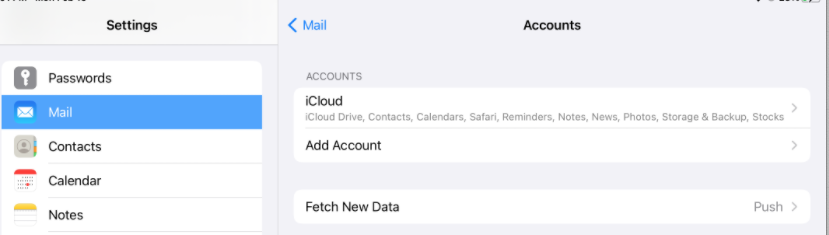
STEP 2 – On left-side panel, scroll down to select “Mail”, and then on right-side, select “Accounts” and then “Add Account”.
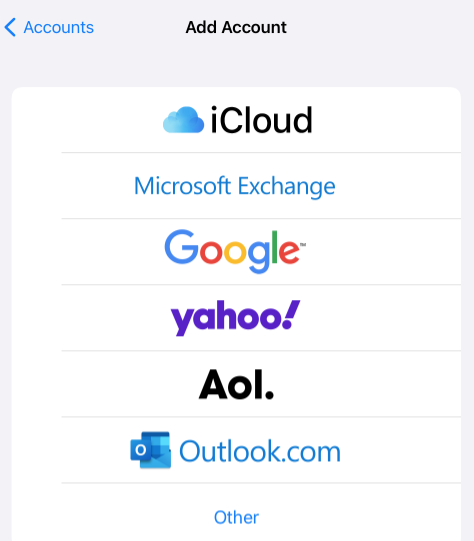
STEP 3 – Select “Other”
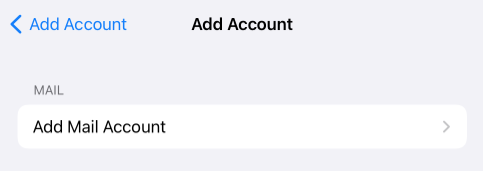
STEP 4 – Click on “Add Mail Account”
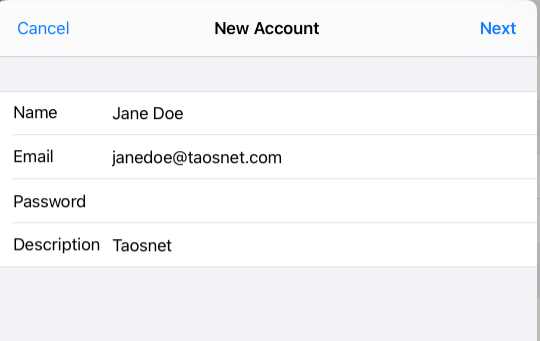
STEP 5 – Enter name that you want on the account. For Email, enter your FULL EMAIL ADDRESS. Enter your password. Enter a description that you want to identify the account. Click Next.
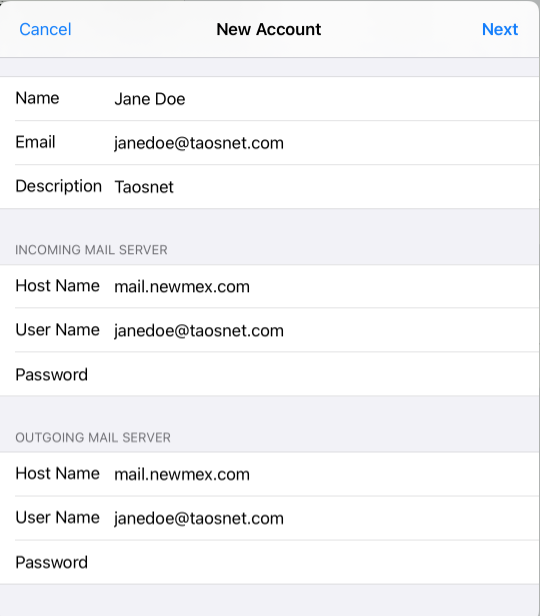
STEP 6 – In the Incoming Mail Server section, enter mail.newmex.com as the Host Name. Enter your FULL EMAIL ADDRESS for User Name. Enter your email password again. Repeat with the same information for the Outgoing Mail Server. Click Next.
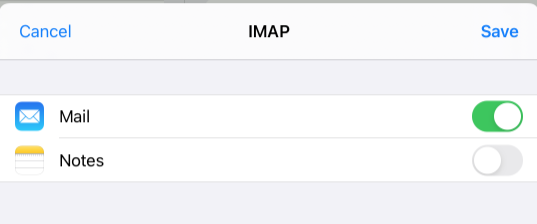
STEP 7 – Click Save and Voila! You are now ready to send and receive mail on your iPhone/iPad.
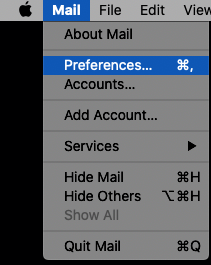
STEP 1 – Click on the Mac Mail icon in your toolbar and then click on Mail > Preferences
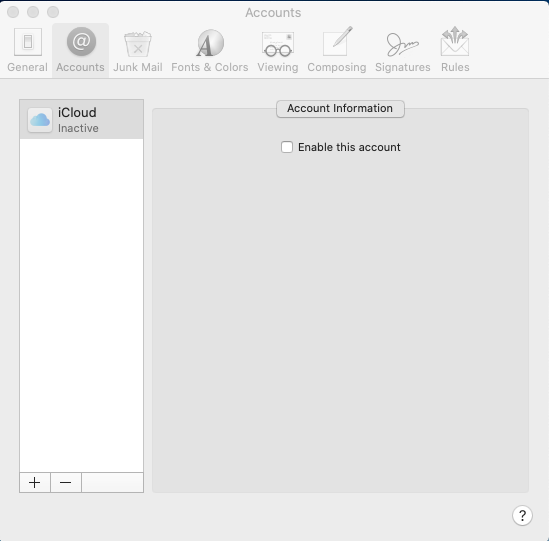
STEP 2 – In Accounts click on the “+” sign at the bottom of the left-side pane
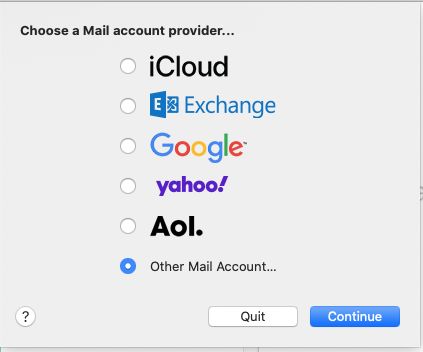
STEP 3 – Select “Other Mail Account…” and click Continue.
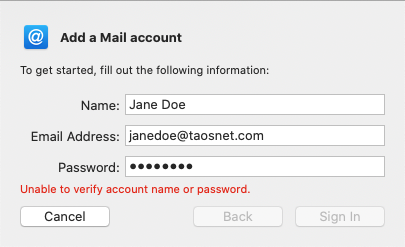
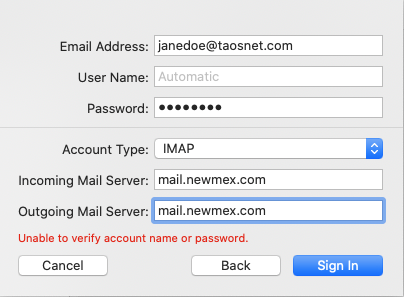
STEP 4 – Enter the Name you want to appear on the account. Enter Email Address and Password. Disregard the “Unable to verify account…”, and click “Sign In”.
STEP 5 – Enter your Full Email Address in the Username. Enter mail.newmex.com in both the Income and Outgoing Servers. Click Sign In.
STEP 6 – Voila! Email should now be set up and you can start sending and receiving email in Mac Mail.
STEP 1 – Download and install Thunderbird, if you haven’t already.
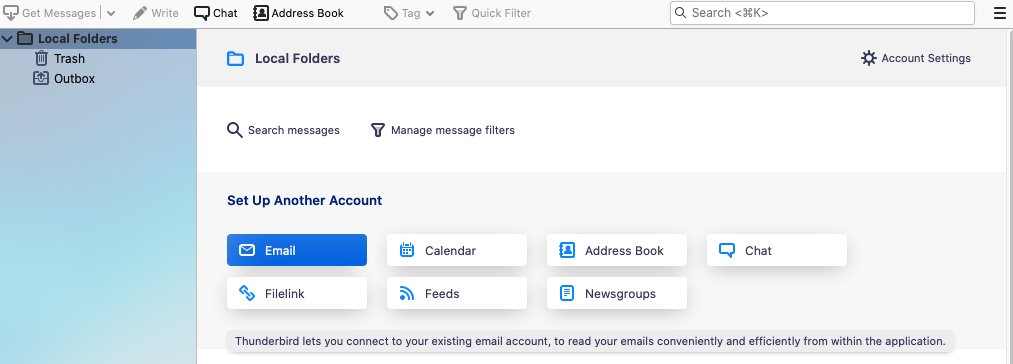
STEP 2 – Open Thunderbird and then click on “Local Folders” and then “Email”
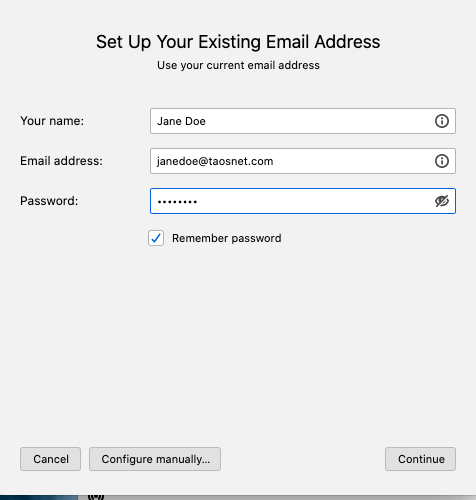
STEP 3 – Enter Your name; Full email address; and your password. The Remember password is checked by default. Click Continue.
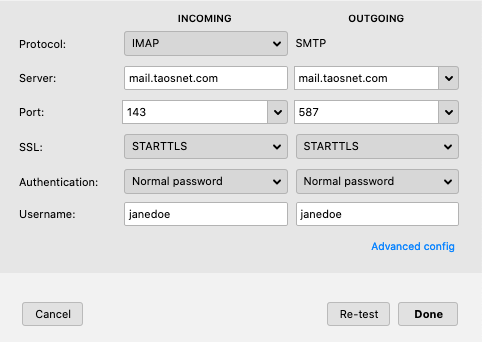
STEP 4 – By default the server name will default to the extension of your email address (in this case mail.taosnet.com). Click on Advanced config.
STEP 5 – Edit the Server for both Incoming and Outgoing servers to be mail.newmex.com (if you are setting up email with newmex.com extension, you won’t need to edit the server). Edit your Username to be the FULL EMAIL ADDRESS. Click done.
STEP 6 – Voila! Your email account has been successfully been set up!
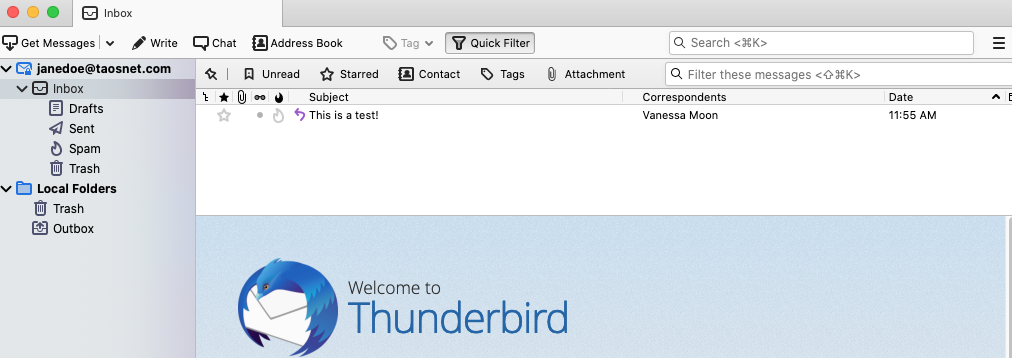
STEP 7 – In order for the server sub-folders to be synced to your Thunderbird, you’ll need to quit Thunderbird and then restart it. Once you do that you should have the sub-folders (Drafts; Sent; Spam; Trash)
You now have a pre-configured Taosnet Blaster router and you want to set it up for your internet router. What do you do? After taking the router out of its box and plugged the power cord in. The next thing you’ll want to do is plug your antenna cable into the router.
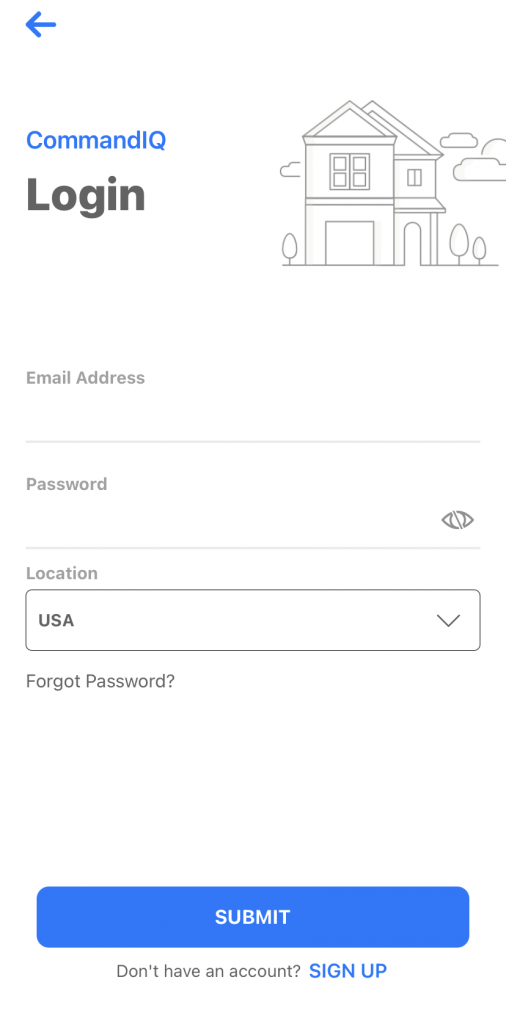
STEP 1 – Download the CommandIQ app from either the Apple Store or Google Play. Download CommandIQ to your device (any device that you prefer, but we recommend your phone so that you always have control). Once downloaded, open the app.
STEP 2 – Login
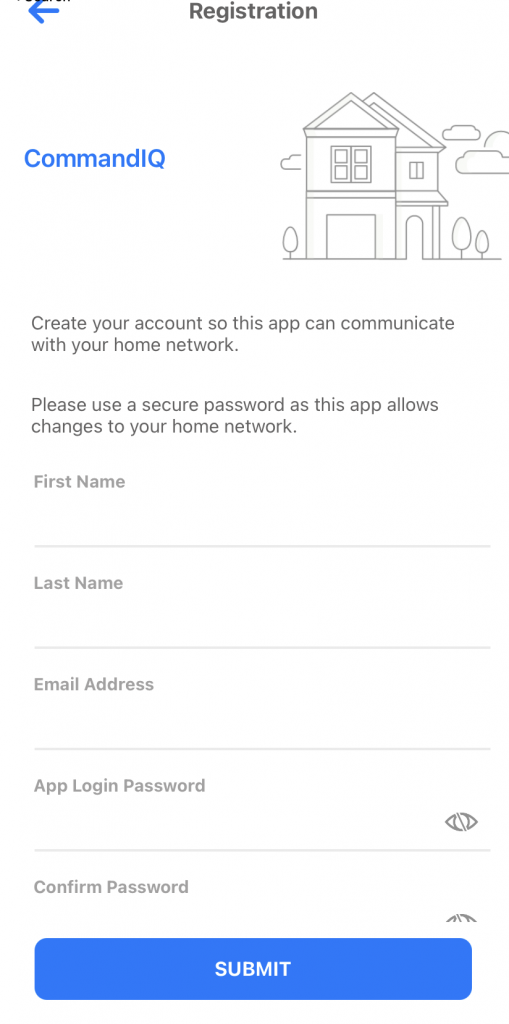
STEP 3 – Registration Tap sign up at the bottom. Use any email address and create a password that you will remember. Tap Submit
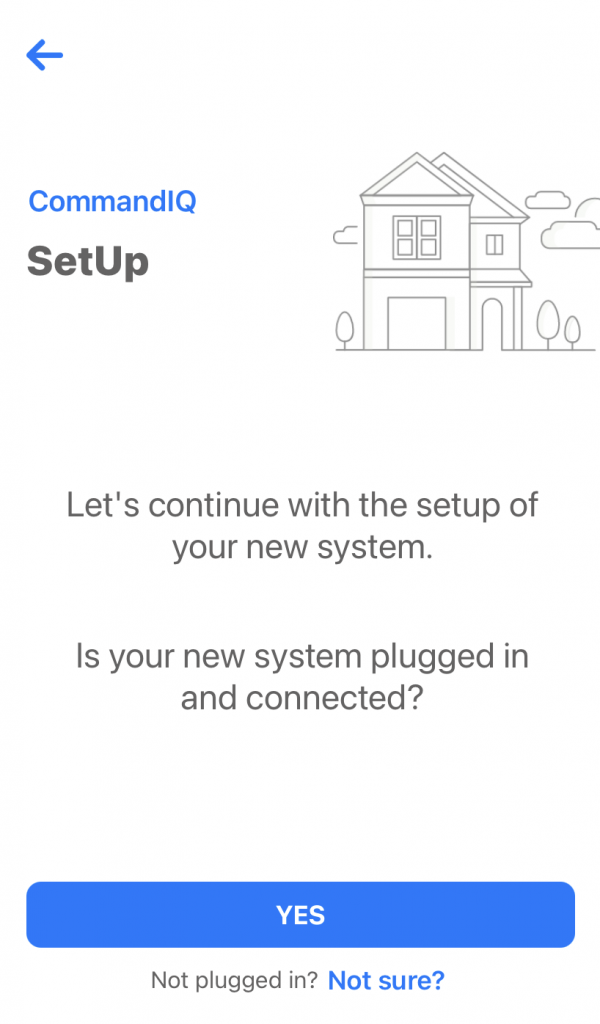
STEP 4 – Set Up – Make sure that your router is plugged in and working, once that is confirmed, tap Yes on the Setup Page.
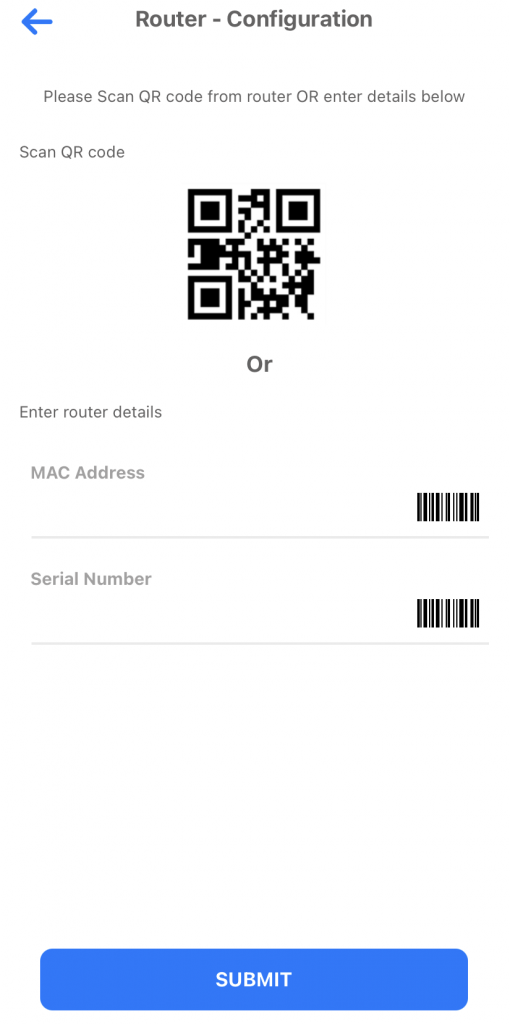
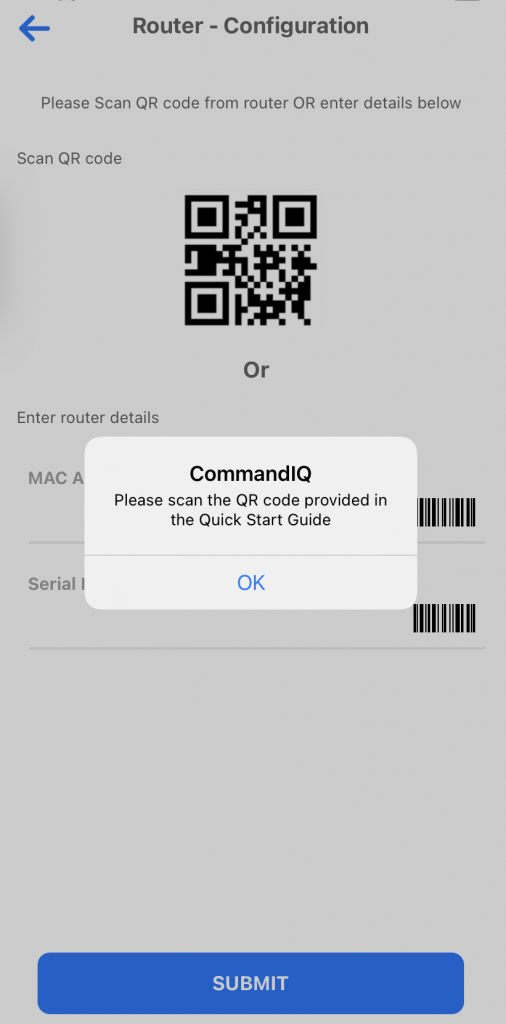
STEP 5 – Router Configuration – Tap QR Code Symbol to bring up the camera on your device. You may have to allow it access first, for it to work. Scan the QR Code on the bottom of the router or scan the QR code on the sticker that came in the box with the router. It will automatically fill in the MAC and Serial Fields. Tap Submit
STEP 6 – Scan QR Code
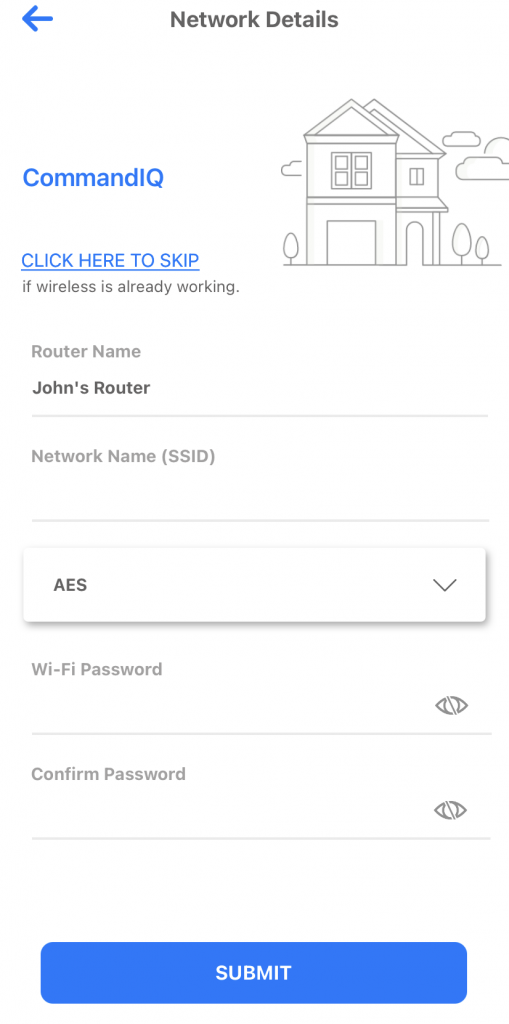
STEP 7 – Network Details – Normally, Taosnet has already configured your router with the proper WifI name and password. If you are happy with the current settings, tap “Click here to Skip” Voila! You are Done.
TAOSNET QUICK SIGN-UP
(Or give me all the internets!)
Fill in this form and one of
our folks will get you
started toward hassle free internet in your home or business as
quickly as possible... Because memes wait for no one.
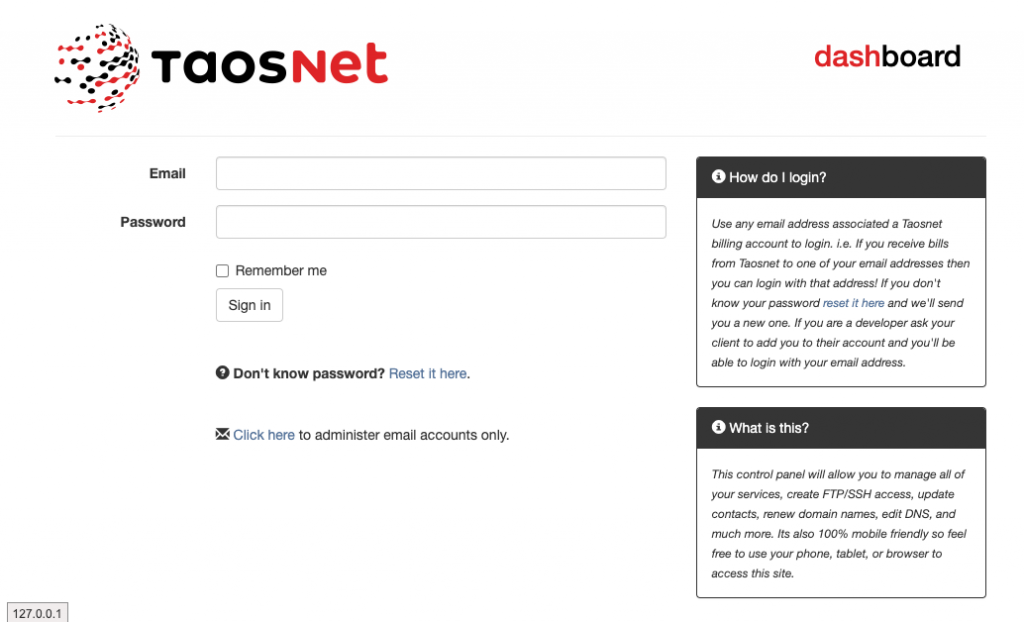
WEBMAIL LOGIN
Use this form to login to your TaosNet email account. Or go the mail webmail login page: mail.newmex.com